Get a counselling call
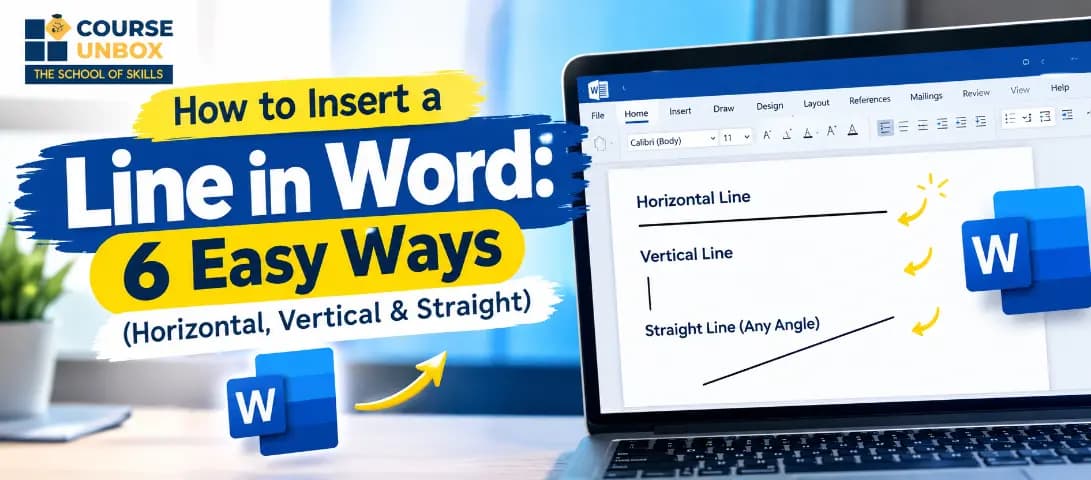
How to Insert a Line in Word: 6 Easy Ways (Horizontal, Vertical & Straight)
he fastest way to insert a line in Word is to type three hyphens (---) on an empty line and press Enter. Word’s AutoFormat instantly turns them into a full-width horizontal line. Prefer more control? Go to the Home tab, click the arrow beside the Borders button, and choose Horizontal Line. To draw a straight line anywhere on the page, use Insert → Shapes → Line and hold Shift while you drag.
A simple line does a lot of quiet work in a document. It separates a letterhead from the body, splits sections of a report, underscores a signature block, and turns a wall of text into something a reader can actually scan. Yet almost everyone hits the same wall the first time: they know they want a line in Word, but Word hides at least six different ways to make one, and each behaves differently when you try to move, format, or delete it. This guide walks through every method for adding a line in Word — horizontal, vertical, and free-drawn straight lines — so you can pick the right one in seconds and never guess again.
By the end you will know how to insert a horizontal line in Word with a keyboard shortcut, how to draw a line in Microsoft Word using Shapes, how to add a vertical line, how to create a clean word separator line between sections, how to remove a line that refuses to disappear, and how to turn off the automatic line feature when Word inserts one you never asked for. The steps work the same whether you are on Windows, Mac, or the free web version, with the small differences called out where they matter.
Insert, add, draw, or make a line — what people really mean
People phrase this task a dozen ways, and the words matter more than they look. Searches like how to insert line in word, how to add line in word, and how to make line in word almost always mean the same thing: a horizontal divider that runs across the page. So when you are adding line in word as a separator, Methods 1 and 2 below are what you want.
But how to draw a line in word (and its variants how to draw line in word, draw line word, and drawing line in word) usually means something different — a free line you place by hand, at any angle, using the Shapes tool in Method 3. The same is true for how to draw lines in MS Word and how to draw line in MS Word; “MS Word” and “Microsoft Word” are the same program, so how to draw a line in Microsoft Word follows the identical steps.
A quick translation guide so you land on the right method the first time:
“Insert / add / make a line” or a plain “word line” → a full-width horizontal divider (Methods 1, 2, 6).
“Draw a line” or “write horizontal in Word” → a free straight line placed by hand (Method 3).
“Straight line” → a Shapes line drawn while holding Shift (Method 3).
“Vertical line” → a column or paragraph-border divider (Method 5).
“Separator line” → a reflowing paragraph border between sections (Method 1).
Which line should you use? (quick comparison)
Before the step-by-step methods, this table matches the job to the right tool. If you only remember one thing about how to make a line in Word, remember that the type of line you need decides the method — a section divider, a signature underline, and a hand-drawn arrow are three completely different objects in Word.
Method | Line type it makes | Best for | Difficulty |
AutoFormat shortcut (---) | Full-width horizontal border | Fast section dividers & separator lines | Easiest |
Borders → Horizontal Line | Full-width horizontal line | Controlled, formatable dividers | Easy |
Insert → Shapes → Line | Free straight line (any angle) | Drawing a straight or diagonal line anywhere | Medium |
Underline / Tab + Underline | Short inline line | Signature & fill-in-the-blank lines | Easy |
Left/Right cell border | Vertical line | A vertical divider between columns | Medium |
Horizontal Line (Web) | Full-width horizontal line | Word for the web / Office Online | Easy |
Method 1: Insert a horizontal line with the keyboard shortcut (fastest)
This is the quickest way to insert a line in Word and the one most professionals use daily. Word’s AutoFormat watches for three identical characters typed on their own line and instantly converts them into a horizontal line that spans the full width of your text area.
Steps
Place your cursor on a blank line where you want the line to appear.
Type three hyphens ( --- ).
Press Enter. The three characters vanish and a thin horizontal line fills the width of the page.
That is the whole trick. Because the line is technically a bottom paragraph border, it stays anchored to the paragraph above it and reflows automatically if you add or remove text. This is the ideal word separator line for letters, reports, and resumes.
The full AutoFormat character reference
You are not limited to hyphens. Each character produces a different style of line, which is useful when you want the divider itself to carry a little visual weight:
Type this 3× then Enter | Line you get |
--- (hyphens) | Thin single line |
=== (equal signs) | Double line |
___ (underscores) | Thick bold single line |
*** (asterisks) | Dotted / dashed line |
### (hash / pound) | Triple line, thick center |
~~~ (tildes) | Wavy line |
Note: The character must be the very first thing on the line and you need exactly three or more with nothing else before pressing Enter. If nothing happens, AutoFormat is switched off — jump to the “Turn off (or on) the automatic line” section below to re-enable it.
Method 2: Add a horizontal line from the Borders menu (most control)
When you want to insert a horizontal line in Word and then style it — change its color, thickness, or width — the Borders button is the better route. This is the classic way to add a line in Word that every version supports.
Steps (Windows & Mac)
Click where you want the line.
On the Home tab, find the Borders button in the Paragraph group and click the small down-arrow beside it.
Choose Horizontal Line from the bottom of the menu. Word drops a full-width line at the cursor.
Format the line after you create it
This method’s advantage is that the line is fully editable:
Double-click the line to open the Format Horizontal Line dialog.
Adjust width (as a percentage of the page), height (thickness in points), color, and alignment (left, center, right).
Click OK. Your custom separator line is set.
If you prefer, you can also open Home → Borders → Borders and Shading to draw a border on any edge of a paragraph — top, bottom, left, or right — which is how you build boxed callouts and one-sided rules.
The three phrasings, one method
Whether you searched how to insert a horizontal line in word, how to add horizontal line in word, how to insert horizontal line in word, or just insert horizontal line in word, the Borders → Horizontal Line command above is the answer to all of them. And if you specifically want to add horizontal line in word that you can recolor to match a brand, this is the only built-in method that gives you a color picker without switching to Shapes. Think of it as the reliable middle ground between the instant keyboard trick and the fully manual drawing tool. For the official steps, see Microsoft’s Insert a horizontal line in Word support page.
Method 3: Draw a straight line anywhere using Shapes
The two methods above create lines that live inside the text. But if you need to draw a line in Word that floats freely — a diagonal rule, a connector, an underline in an exact spot, or a straight line across a form — you want the Shapes tool. This is how to draw a straight line in Word at any angle and position.
If you have been searching how to draw lines in word and only finding advice about dashes, this is the section you actually wanted — real, movable lines you place yourself. Microsoft documents this tool in Draw a line in Word or Outlook.
Steps
Go to the Insert tab and click Shapes.
Under Lines, click the first Line option.
Click and drag on the page from the start point to the end point.
Hold the Shift key while you drag to lock the line to a perfectly straight horizontal, vertical, or 45° angle.
Pro tip: Holding Shift is the secret to a clean straight line — without it, a hand-drawn line in Word is almost never level. Once drawn, select the line and use the Shape Format tab to change its color, weight, dashes, and arrowheads.
This same Shapes method is what people mean when they search how to draw lines in MS Word for diagrams, sign-here rules, or striking through content. Because each line is a separate object, you can select it, move it with the arrow keys, or delete it with a single tap of Delete.
Drawing a perfectly straight horizontal line
If your goal is specifically how to draw a straight line in word that sits dead level, the Shift key does all the work. Start dragging left-to-right and press Shift before you release — Word snaps the line to an exact horizontal. The same trick answers how to draw straight line in word and even the common misspelling how to draw a straight line on word; the method never changes. It is also the cleanest way to how to draw a horizontal line in word when you need it in an exact spot rather than tied to a paragraph, and it is what people are really after when they search how to write horizontal in word — a straight, level rule they can position freely.
Once the line exists, the Shape Format tab (called Shape Format or Format depending on your version) gives you weight in points, dashes and dots, a full color palette, and arrowheads on either end — far more control than any autoformat line offers. Select the line, hold Ctrl, and drag to duplicate it if you need several identical lines down a form. If you later need to tidy up, Microsoft’s Draw or delete a line or connector page covers editing these objects in depth.
Method 4: Make a line for signatures and fill-in-the-blanks (underline)
Sometimes you do not want a full-width divider at all — you want a short line to sign on or to fill in a name, date, or blank. There are two reliable ways to make this kind of line in Word.
Option A — Underlined tab spaces (best for forms)
Turn on underline with Ctrl + U (Windows) or Cmd + U (Mac).
Press the Tab or Spacebar key to extend the line to the length you need.
Turn underline off again with the same shortcut.
Option B — Underline with a leader (cleanest)
For a fill-in line that always ends at the same margin (e.g. Name: ______________ ), set a right tab stop with a solid underline leader from the ruler. This keeps every blank line aligned no matter how much you type before it — the mark of a professional form.
Method 5: Add a vertical line in Word
Everything so far has been horizontal. To add a vertical line in Word — for a page-edge accent, a divider between two columns, or a change-bar down the margin — you have three good options.
Option A — Shapes (anywhere on the page)
Insert → Shapes → Line, then hold Shift and drag straight down. Fast and flexible for a floating vertical line.
Option B — Paragraph left/right border (beside text)
Select the paragraph(s).
Home → Borders arrow → Borders and Shading.
In the Preview, click the left or right edge to place a vertical line there, then click OK.
Option C — Page Borders → Bar (between columns)
If your document uses two columns, go to Layout → Columns → More Columns and tick Line between. Word draws a vertical separator line down the gutter automatically. For a worked example of both horizontal and vertical lines, GeeksforGeeks has a useful guide to inserting horizontal and vertical lines in MS Word.
Method 6: Insert a line in Word for the web (Office Online)
The free browser version of Word is slightly different, but you can still add a horizontal line in Word online. The keyboard AutoFormat trick is the most reliable there:
Click on a new, empty line.
Type --- (three hyphens).
Press Enter — the line appears instantly.
The Borders button also exists on the Home tab of Word for the web, though the full Format Horizontal Line dialog with color and width controls is only available in the desktop apps. For heavy formatting, open the document in the desktop version.
How to remove or delete a line in Word
This is the step every other guide skips — and the one that sends people back to Google. The way you delete a line depends entirely on how it was created, which is why lines can feel impossible to get rid of.
Removing an AutoFormat / border line
A line made from --- or the Borders menu is a paragraph border, so pressing Delete or Backspace does nothing. Instead:
Click in the paragraph directly above the line.
Home → Borders arrow → No Border. The line disappears.
Removing a Shapes line
Click the line once to select it (you’ll see selection handles), then press Delete. Done.
If the line won’t go away: It’s almost always a paragraph border. Put your cursor just above it, open Borders → Borders and Shading → set “Setting” to None → OK. That clears even stubborn imported lines.
Microsoft has a dedicated walkthrough for this exact problem in Remove a line in Word.
Turn off (or on) the automatic line feature
Word’s helpfulness can backfire: type three hyphens by accident and it inserts a line you never wanted. Here’s how to control that behavior.
Windows
File → Options → Proofing.
Click AutoCorrect Options.
Open the AutoFormat As You Type tab.
Tick or untick Border lines, then click OK.
Mac
Go to Word → Preferences → AutoCorrect → AutoFormat As You Type and toggle Borders the same way.
Microsoft explains every toggle in this dialog on its AutoFormat as you type support page.
Troubleshooting common line problems
Problem | Cause | Fix |
Typing --- does nothing | AutoFormat ‘Border lines’ is off | Re-enable it in AutoCorrect Options (see above) |
The line won’t delete | It’s a paragraph border, not text | Cursor above it → Borders → No Border |
Line is off-center / crooked | Free Shapes line drawn by hand | Redraw holding Shift, or set position in Shape Format |
Line moves when I type | It’s anchored to a paragraph | Convert to a Shapes line for a fixed position |
Can’t change the color | It’s an AutoFormat line | Double-click it and use Format Horizontal Line |
Best practices for using lines in Word
Use lines sparingly. One or two clean dividers look professional; a page full of rules looks cluttered.
Match the method to the job. Borders for dividers, Shapes for free-drawn straight lines, underline leaders for forms.
Keep thickness consistent. Reuse the same line style across a document so it reads as one design.
Prefer paragraph borders for separators. They reflow with your text, so a word separator line never ends up stranded on its own page.
Check it on export. Before sending a PDF, confirm lines sit where you expect — hand-drawn Shapes lines can shift if the text around them changes.
Final thoughts
Once you know that a line in Word is really one of three things — a paragraph border, an AutoFormat rule, or a free-drawn Shape — every version of the task gets simple. For a fast separator, type --- and press Enter. For a formatable divider, use the Borders menu. To draw a straight line anywhere, reach for Shapes and hold Shift. And when a line won’t leave, remember it is almost always a border you clear from the paragraph above it. Bookmark this page and you’ll never have to search how to insert a line in Word again.
About the Author
Jugal Chauhan
Jugal Chauhan is a digital marketing strategist and tech educator with a passion for making complex topics accessible. He writes about marketing, technology, and professional growth to help learners and businesses thrive in the digital age.
Learn more about us →